
Mahogany finishes have faded from glory. Hard. Not once in my furniture refinishing career has a customer asked me for a “mahogany” finish. That deep, almost purplish, bing-cherry red has been cast aside for lighter, beachier tones. There’s nothing wrong with a mahogany finish. It was vogue, once. But no more, lost in the backwaters of changing taste.
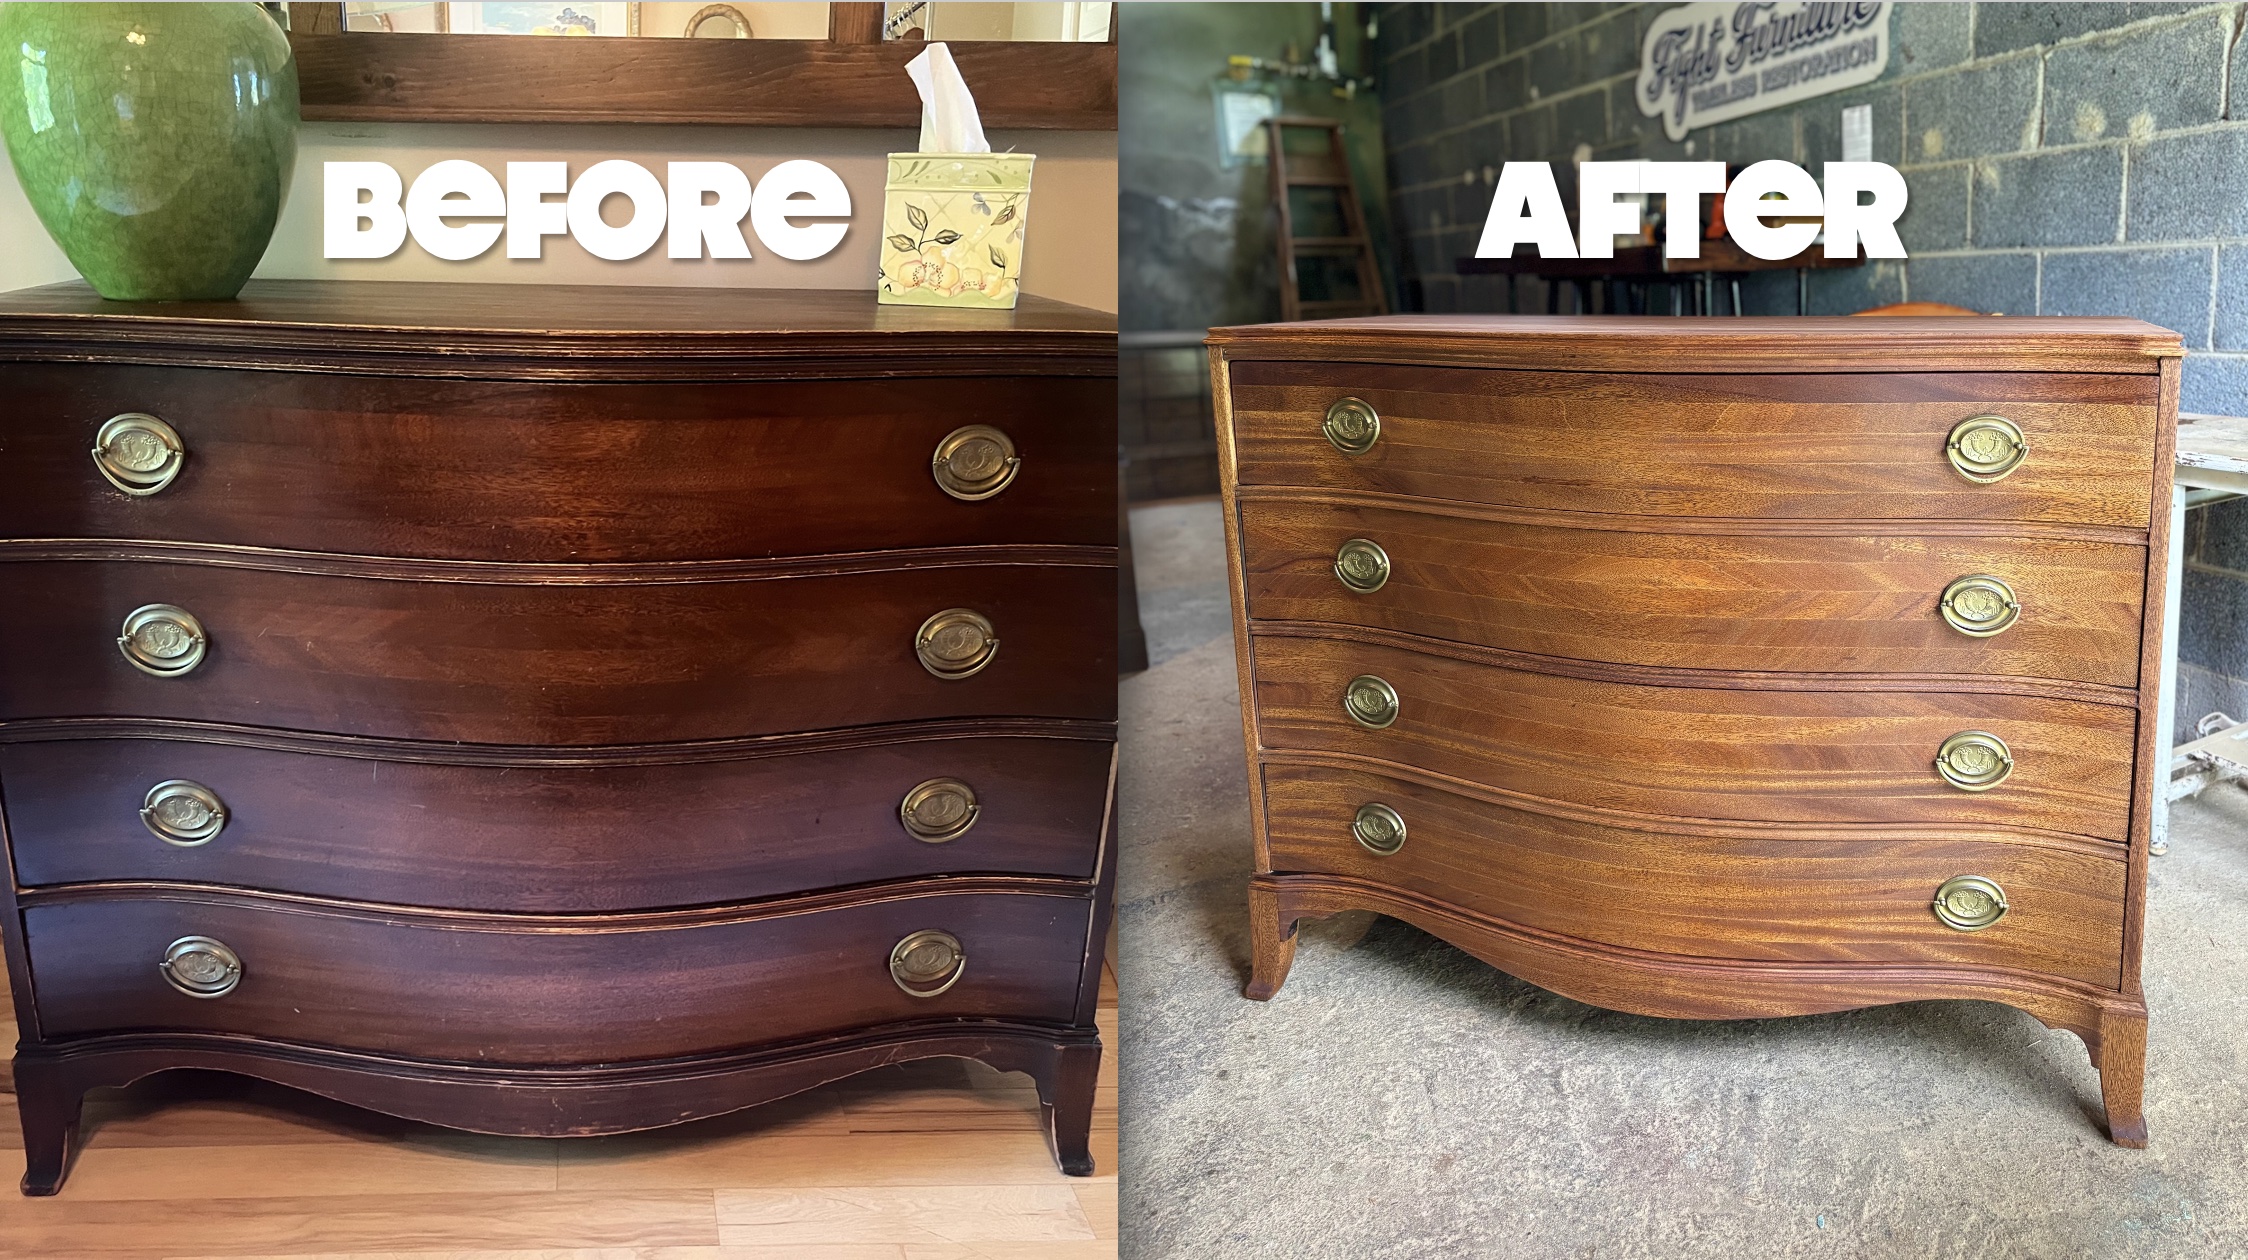
I was hired recently to completely refinish a 100% mahogany dresser. The customer sought a finish lighter, and once I’d stripped the old purplish finish, I found this was would be a natural task. The buttery, sandy mahogany wood was beautiful, even contemporary. The end result (check out the video below) was encouraging, and I can’t wait until the next mahogany finish appears in my shop.
How to Refinish a Mahogany Dresser
Step 1: Remove the old finish
The manufacturer’s (if you know the name, please drop it in the comments) toned lacquer stripped off easily with my Festool Orbital Sander. Being 100% mahogany with thickly veneered drawer-fronts, I was able to sand off the entirety of the finish with 120 grit.
If this wouldn’t have been the case, I would have first utilized a chemical stripper (my favorite non-toxic option is QCS Stripwell), then scraped off the old finish before sanding with 120 grit.
After removal of all the finish’s residue, I sanded down the whole piece with 150-grit.
Step 2: Choose your tone, stain, or oil
My customer sought a natural appearance, and I thought this wise, so I opted for Danish Oil, choosing Watco’s Medium Walnut color. I first tested it on an underside of a drawer, then applied two thick coats across the drawers and dresser, following the manufacturer’s directions. The color came out golden, a sunset-hued wheat.
Mahogany accepts oil, stain, and toner well. It’s a gracious wood. If you follow the manufacturer’s directions, I’d expect happiness barring the color was the right choice.
I let the piece dry for three days, making sure to wipe it with a dry rag twice a day to catch any oil-seeping from the open pores of the woodgrain.
Step 3: Add a protective topcoat (or don’t…)
This mahogany dresser would be featured in a guest bedroom, thus the customer sought a more protective finish. Oil-based polyurethane was the choice, as I thought it wouldn’t detract from the natural appearance of the finish while adding just enough durability. I sprayed two coats of Varathane’s Oil-Based Polyurethane, which added more warmth and glow to the wood.
Lacquer would be a good option. I always seal the piece first with Mohawk’s EZ Vinyl Sealer before applying pre-catalyzed lacquer.
You could also just leave the Danish Oil alone and let it harden inside the wood, lending enough protection depending on its use and environment.
(Looking for the right equipment and supplies? Check out my full workshop collection HERE.)
Check out the full restoration video 👇
(Disclaimer: If you purchase these products using the links below, I may receive a small commission in return from Amazon.)
Leave a Reply