
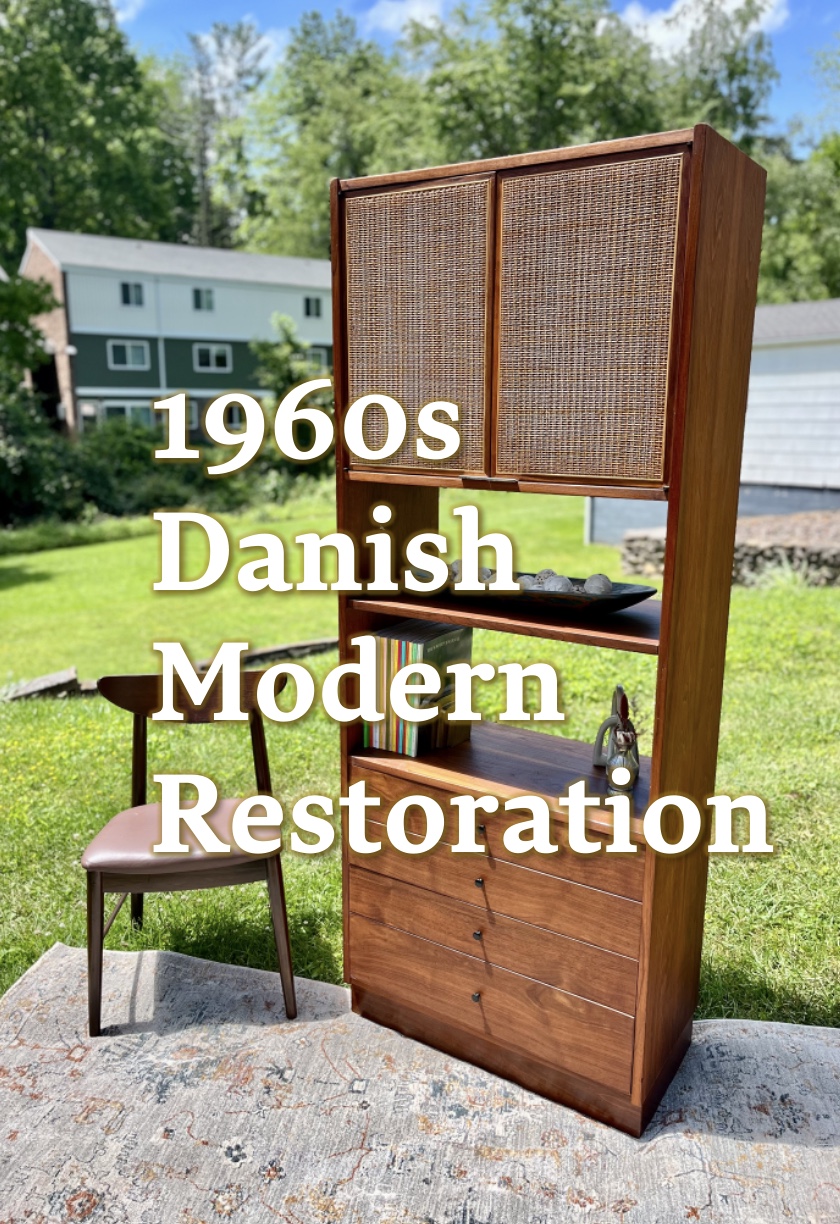

When I locate a piece of furniture for restoration, I like to give it space. For at least a week, I won’t touch it. In its presence, I’ll work on other projects while it abides on the other side of my workshop.
This is the best way to serve furniture in my opinion. I need time to see it from all angles, to understand it, before I launch into the restoration. I need to sense the heart of the piece. Only then, once I’ve understood it and can commit to a vision, will I start the restoration.
So it went for this 1960s Jack Cartwright for Founders cabinet. It sat in the corner for a week, watching me work, until its time came. During that week—if you can believe it—I considered removing the base and replacing it with angled feet. To replace all the damaged veneer would be too much work, too much time, I reasoned with myself. But the piece remained in its corner, asking for better. By the time the space opened to start on it, I was committed to a full-stop restoration that would make Jack Cartwright proud, damn the tediousness of veneer replacement.


Step 1: Structural Repairs
Before removing the previous finish, I like to repair anything that needs fixing. For this piece, the drawers and cabinet doors slid smoothly. The rattan was in impeccable condition given its age. Fixing the veneer was my main focus… but there was a lot of veneer to fix.
I opted to do a patchwork replacement instead of replacing entire sections of veneer, that way the restoration would remain as integral to the original as possible. I ordered sheets of walnut veneer from Amazon, then traced outlines of the areas to be replaced (one drawer’s corner, the cabinet’s top, both exterior panels of the base), then glued those traced sections into the place. After clamping for several hours, I sanded them smooth and was ready to move onto finish removal.
(To see the whole process of veneer replacement, reference the video at the bottom of this page).
Step 2: Finish Removal
Given the original finish was danish oil and the piece was covered in dings, dents, and scratches, I removed the finish with my Festool orbital sander. Out of concern for sanding through the walnut veneer that covered the entirety of piece, I began the sanding with 150 grit paper, then 180 grit, and finished with 220 grit. I was able to successfully smooth and remove all the previous dings and dents. Afterward, I cleaned the surface with a wet rag, then passed over the whole surface with tack cloth.
Step 3: Danish Oil Application
As I thought about how to refinish this piece, I considered several paths—stain, gel stain, toning—but I couldn’t escape how beautiful the underlying walnut veneer was without a single thing! So, I kept it on the path of its original essence, opting to apply Watco’s Danish Oil. Seconds after application, I didn’t regret the choice.
I saturated the whole piece, waited fifteen minutes, then saturated it again. Fifteen minutes later, I wiped off any residual danish oil.
Given danish oil is part oil and part varnish, I chose to avoid an additional topcoat. Once danish oil is cured, it can be hardy, particularly if used on low wear and tear pieces (for a counter-example, danish oil on a coffee table would invite disaster without a topcoat).
After it had cured, several areas of the veneer replacement didn’t match the piece’s color. I used furniture markers to touch up smaller areas, along with a light coverage of stain. On the cabinet top, I blended the color using sprayed toner (again, see video for full details).
The End Result
A day after listing, the Jack Cartwright cabinet sold for $550. It was a privilege to get to work on this one, and I’m glad I didn’t hack off its bottom!
Leave a Reply